
Very little is available for these boxes, unfortunately.
Disassembly:
- Clean the steering house. Afterwards, you might look a bit dirty :-p

- Remove the steering house from the front suspension (4 bolts). Clean it further.
- Attention! In order to remove the universal joint the tensioning bolts have to be removed, not just loosened.
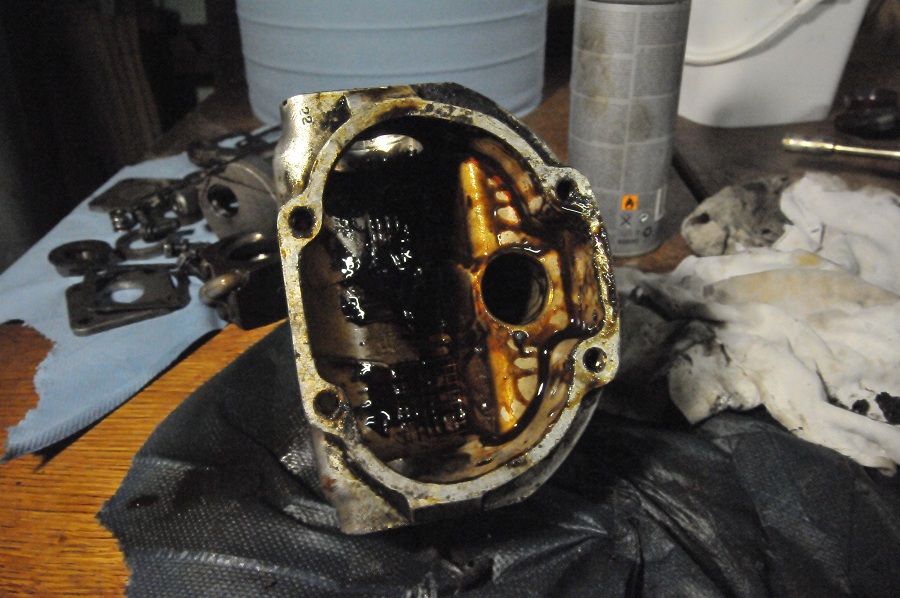
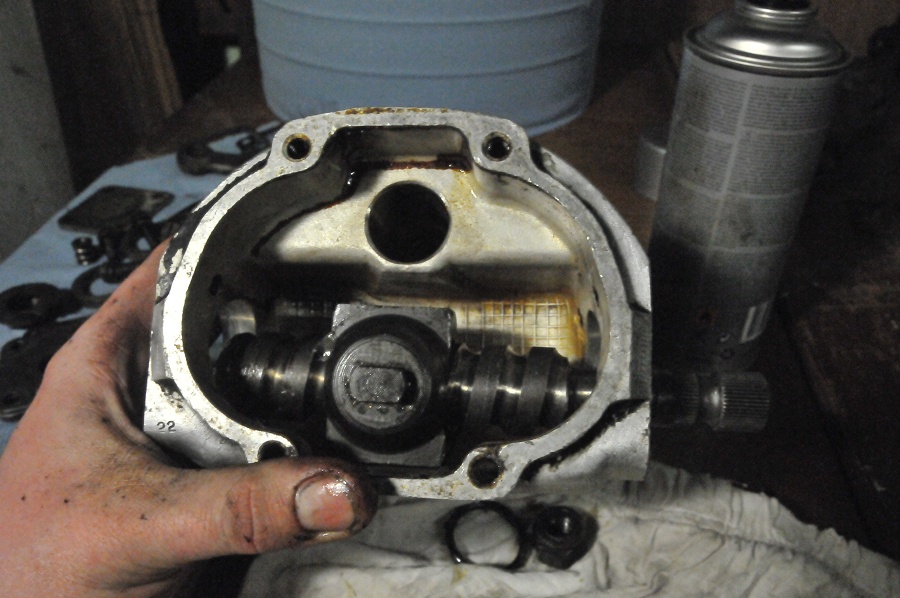
- Remove the 4 1/2" bolts from the lid, remove the lid and pour the oil out. Beware! There is a loose spring in the lid (see the photographs below), don't lose it. The roller (see photos) can also be removed from the main nut.
- Remove the bolts from the front and back plates. Be careful: the steel balls might already fall out so preferrably do this in a clean environment and over a bucket or something.
- If nothing falls out: the distance pieces, gaskets and shims should come out rather easily. Then, push out the ball races - little or no force should be necessary, don't use a hammer or any very brute force. Pushing the worm back and forth might help. There are 10 balls on each side, make sure you retrieve them all.
- Turn the worm out of the main nut. Some balls will fall out so be careful not to lose them. Remove the rest of the balls (31 in all). There are balls in the tube as well. I've found there's no need to remove the tube. You can probably shake the balls out, and if you can't, it's not really a problem, just leave them in.
- You should be able to remove the main nut but it's not easy with the rocker shaft still in the way, so you might want to remove that first:
- Remove the large nut that holds the drop arm. There's a locking washer underneath it so this might require some force. With the main nut off the worm there's no chance of damaging anything anymore.
- Remove the drop arm from the rocker shaft. It's a taper fit so it will require either a bearing puller or some tapping with a plastic hammer. Take out the rocker shaft as well.
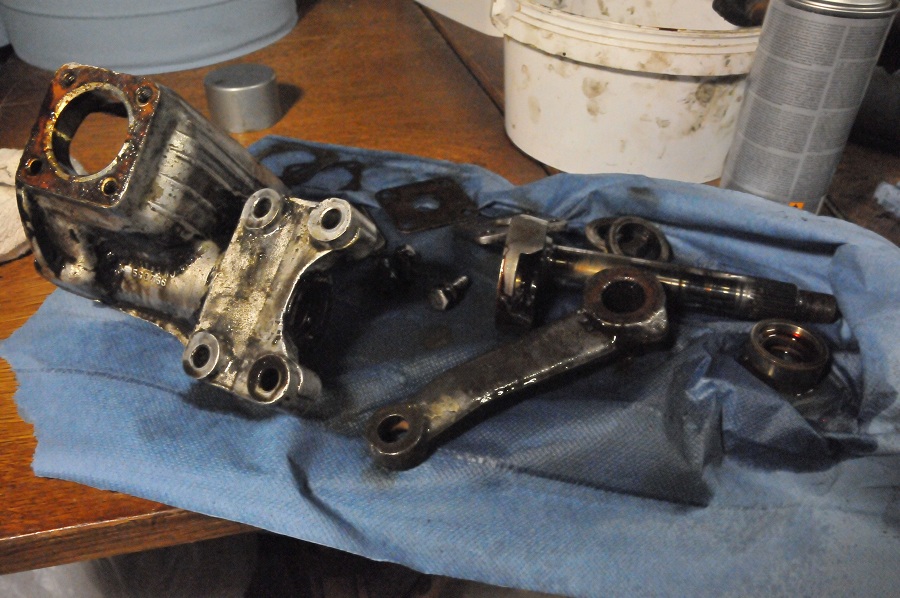
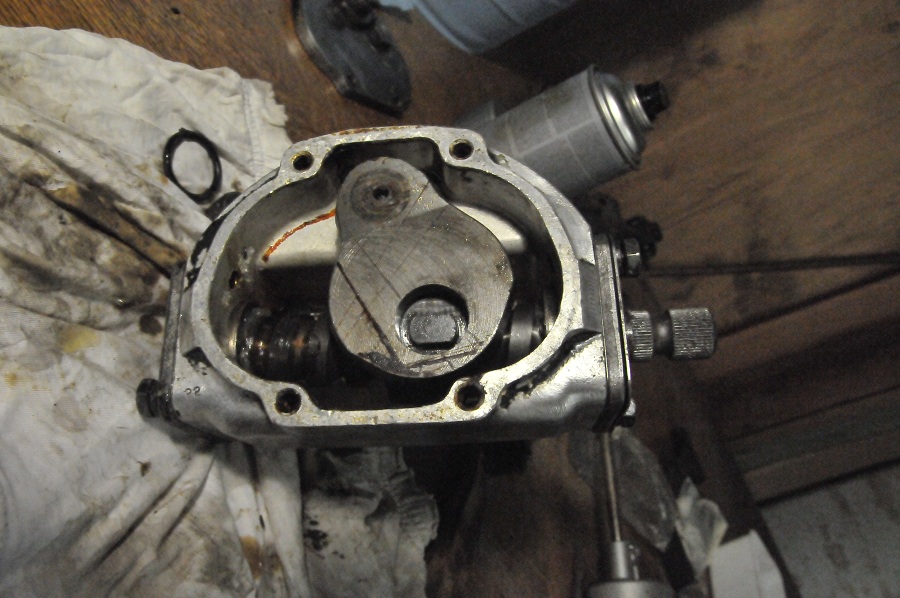
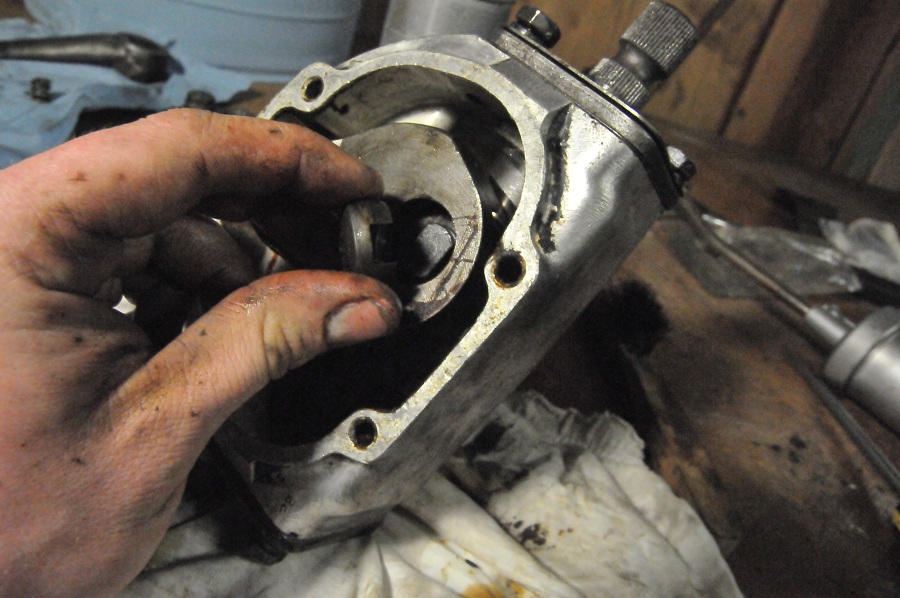
This is wat you're left with after disassembly. Some more cleaning is in order.
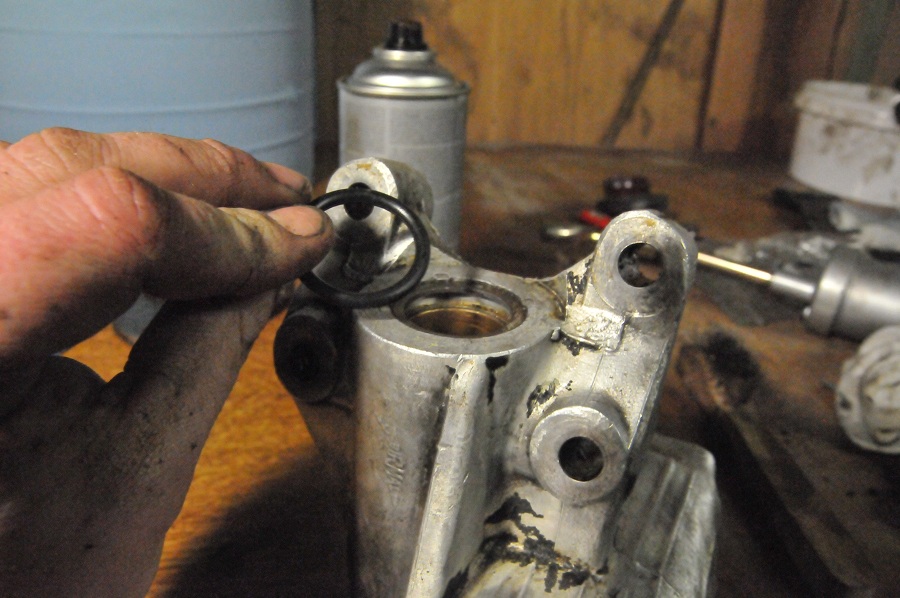
Apparently the "O"-ring is no longer available from Jaguar or SNG, but it's a #214 (imperial size) ring - if I remember correctly - you can buy at any automotive parts store (I guess). Take the old one with you.
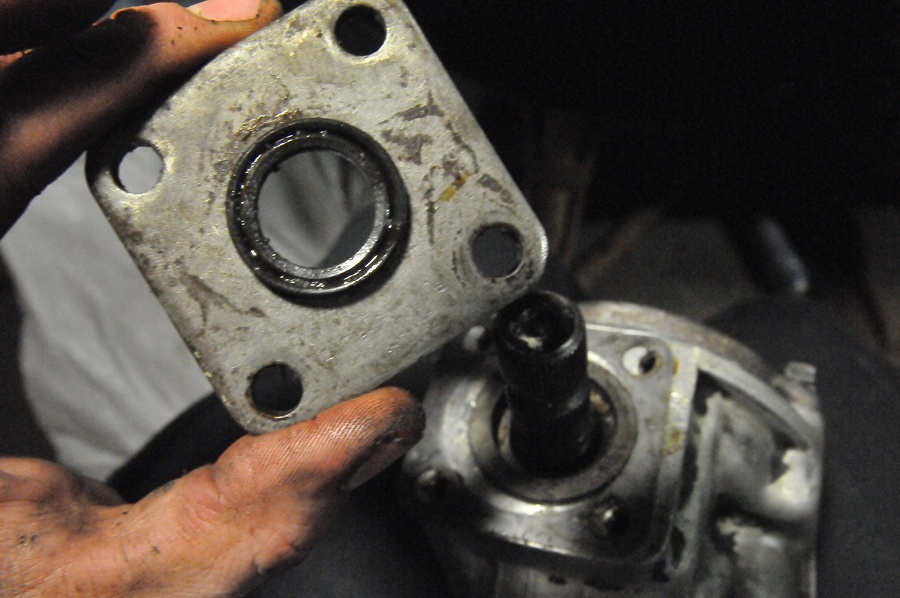
This oil seal is probably the only thing that's still available. Part # is 6415 and both SNG and David Manners still carry it.
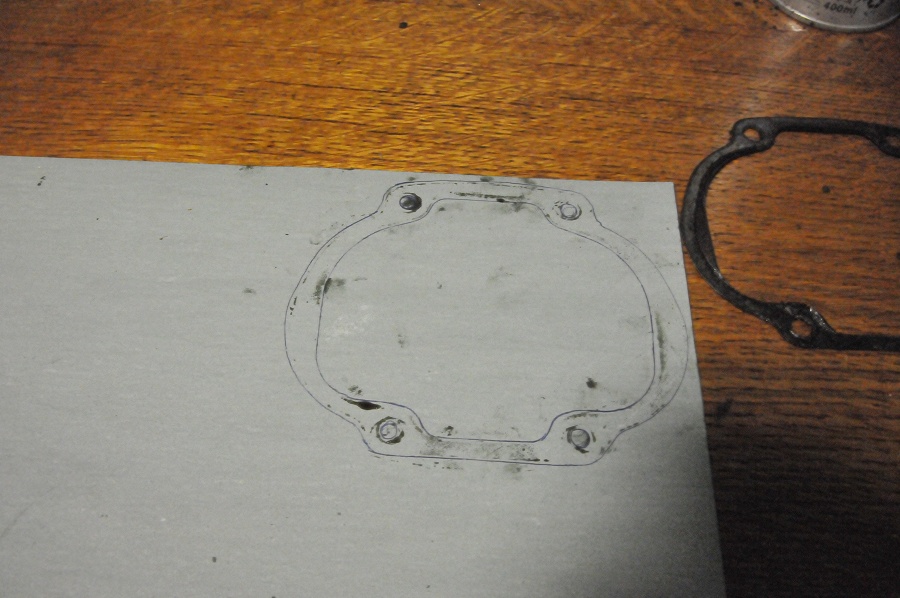
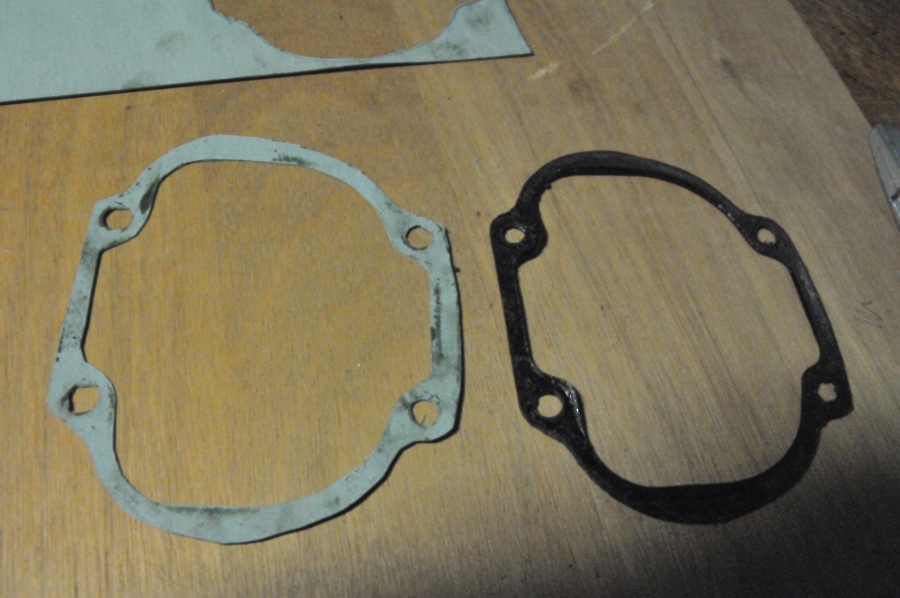
I had to cut the other gaskets from gasket paper. The thick one cost me about €5 for an A4 size sheet, the thinner one about €2.
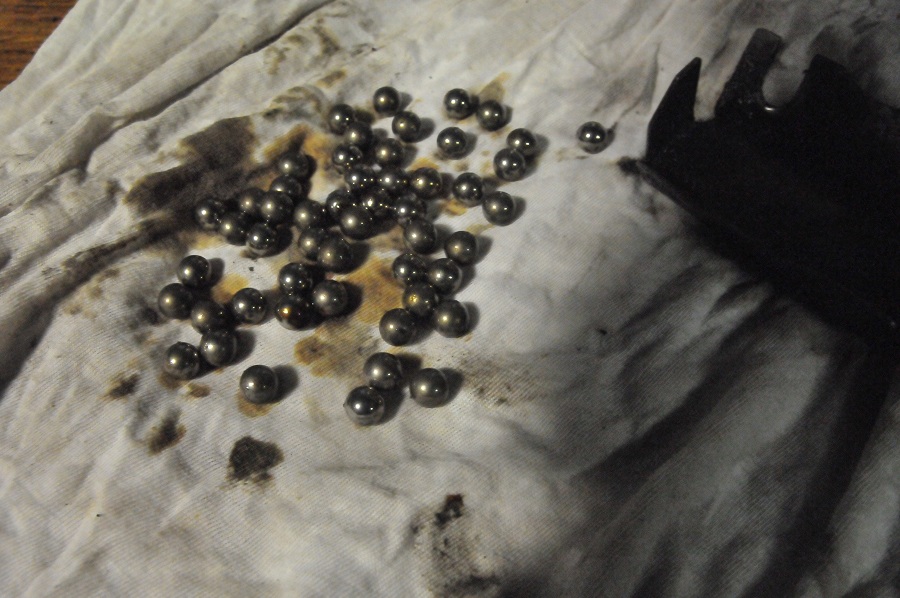
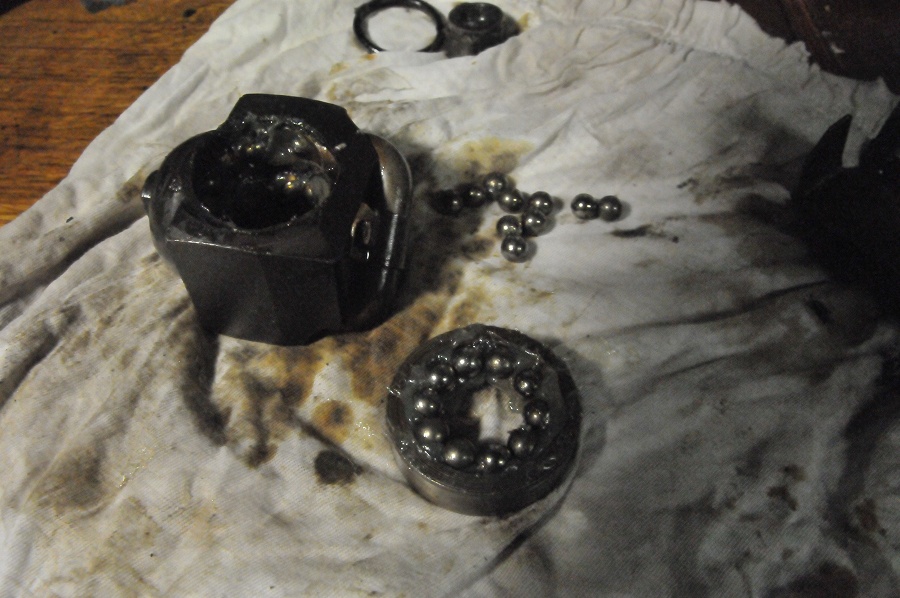
The balls. Put them in their place with some grease - it actually works pretty well. Put the balls in the main nut (don't forget to fill the tube) and in one of the races. Just put grease in the second ball race. It helps to count the balls so you're sure you've got them all in place.
Turn the worm in the main nut.
Put the empty race over the front of the worm to where the shaft is thinner and put the balls in their place there.

Put the front plate, distance piece and gaskets and shims in their place. It's best to keep some pressure on the worm so the balls don't fall out of their race.

Put the rear ball race, distance piece, gaskets and shims in place. That's why it's good to assemble this race in advance.
Put the roller back in its place.
Depending on LHD or RHD, the drop arm has to be in the right position on the rocker shaft. This is made quite clear in the service manual.

This is the infamous spring which you must, under no circumstance, lose.

Now put the lid on and check clearances as described in the manual.
One more thing: there are 4 shorter and 8 longer bolts, each has a locking washer. The shorter ones are for the lid.
Now, you might think that you can put everything in the other way around and convert an LHD steering box to RHD. Unfortunately, this won't work. The housing itself is not symmetrical and you can't just turn it around. I do believe that everyhting else except the housing itself (and probably the lid) are interchangeable between LHD and RHD.
How can we know if the steering box needs to be rebuilt in the 1st place? I know a fellow who has a running MK II who is complaining of stiffer steering after getting it inspected. Could the balls be worn out or could too heavy of an oil have been put in it? You can Email me at bigfastjack at a yahoo address.
BeantwoordenVerwijderenBest,
Adam
Hi, I had a leaking steering box, non-power, in my 1964 Mk2 and as the car is getting a complete restoration I want to address the leak and change the oil in the steering box. I drained the oil and it was brown, nothing like oil at all. on looking itnto the box there was lots of brown goo which needed removing. All was washed out in petrol from the shaft end and when the petrol was shaken about and drained numerous ball bearings were washed out as well. I have gone on to remove the other 2 plates and have an understanding on how the system works. My problem is loading the inner 21 bearings.Does 10 go to the front and 11 to the back or are they stacked one row above the other. Photo number 8 from top down does not clearly show where they go. Why is there that odd 1 ball (41) and where does it go. I am stumped and hope you can read this and reply. Would love to see a photo or 2 of the restored 2.4. Thanks Eugene
BeantwoordenVerwijderen